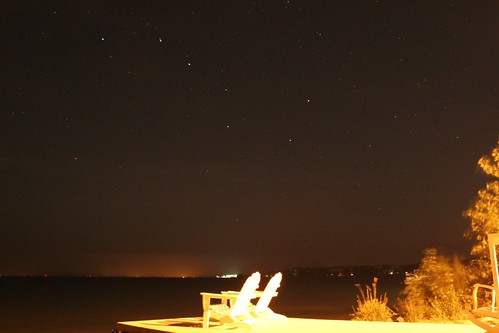
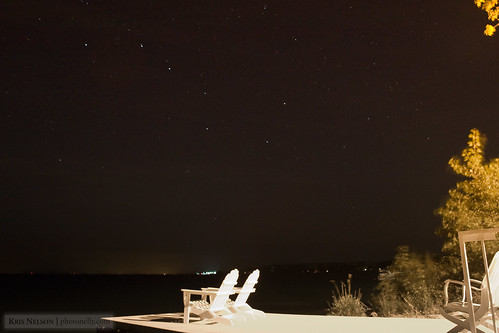
The previous two editions in my Before and After series have featured the use of the Topaz Adjust plug-in for Photoshop. Sometimes that extra creative step isn’t needed, and the following images demonstrate. Many times it’s just a few minor tweaks in Adobe Camera Raw that will do the trick.
The Before Image
Most people will recognize that as the Big Dipper constellation, which I captured here over the waters of Sturgeon Bay in Sept. ‘08. It’s a neat little shot, but I wasn’t happy with the orange tint. Also, I had took a few liberties when I cropped this image initially, so I thought there might be something worth bringing back into it on the redux.
The After Image
I took a few different approaches to redoing this image. What I ultimately ended up with was processing the RAW image twice – known as mutli-RAW processing – to preserve some of the darkness in the sky while adjusting some of the foreground elements.
By processing the elements of the scene independently on separately layers and applying the changes using a gradient mask, I essentially keep the best of both worlds and have an image more to my liking with relatively little extra effort.
Thoughts?
For one, I definitely like the detail on the right with it’s color more in check and not gushing orange hues. However, each time I look at that after image, I still think to myself, “is the foreground too bright?”. Since I save checkpoints at each step in my workflow, it wouldn’t be that difficult to go back and just darken the chairs on the pier just a tad.
Well, what do you think?


2 Comments
I like that you removed the orange tint. Did you try cropping vertically?
I wonder if a portrait crop–starting at the bottom right of the chairs–would cut down on the foreground brightness, while introducing a “look up at the sky” focal point.
Just something to consider. 🙂
Great feedback, Andy. Hadn’t thought of the vertical crop, gonna have to give that a try.